The last few weekends I have been fortunate. My wife has demanded that I finish some projects around the house. Normally, I would probably whine and complain about having to finish projects because those projects are usually things like organizing the filing cabinet, sharpening crayons, dusting under the bed, and arranging the pantry into alphabetical order. These projects, however, are much more fun. Finishing the shed, is the unfinished job (one of hundreds) I have been focusing on lately.
 |
| Almost Finished... |
In addition to shingling the roof (boring asphalt on one side and metal panels on the other) I decided to shingle the walls, with cedar shingles. One note I'd like to make up front is that this is my first experience with installing cedar shingles. I did receive some advice from someone who used to install these for a living, and I did some research on my own. After working with them for a few days, I'd say that a project this size is perfect for someone looking to learn a little about the basics of working with these. I decided to go with cedar shingles as opposed to shakes as that is what my local hardware store had in stock. Just a quick mention (as it was explained to me in rather passionate detail) is that shingles are typically milled/sawn on both sides, while shakes are split (typically by hand) on one or both faces. As a result, shingles are more uniform in appearance than true shakes. I would also recommend taking my friends advice and be very wary about purchasing cedar shingles from a big box hardware store. I got a mix of 3 and 4s from my local big box and quickly realized that they were one step away from mulch. I realize that 3 and 4s are the bottom of the bunch, but these were worse than I expected. These are pretty much thrown together into ungraded bundles and shipped out the door to make a buck. Fortunately, due to some rather aggressive roof overhangs these shingles won't actually get too much weather. If I were doing a larger project, a roof, or something that required a more consistent appearance, I would likely order higher grade shingles or shakes from a reputable mill/producer or dealer in hopes that I'd get a more consistent and better quality product.
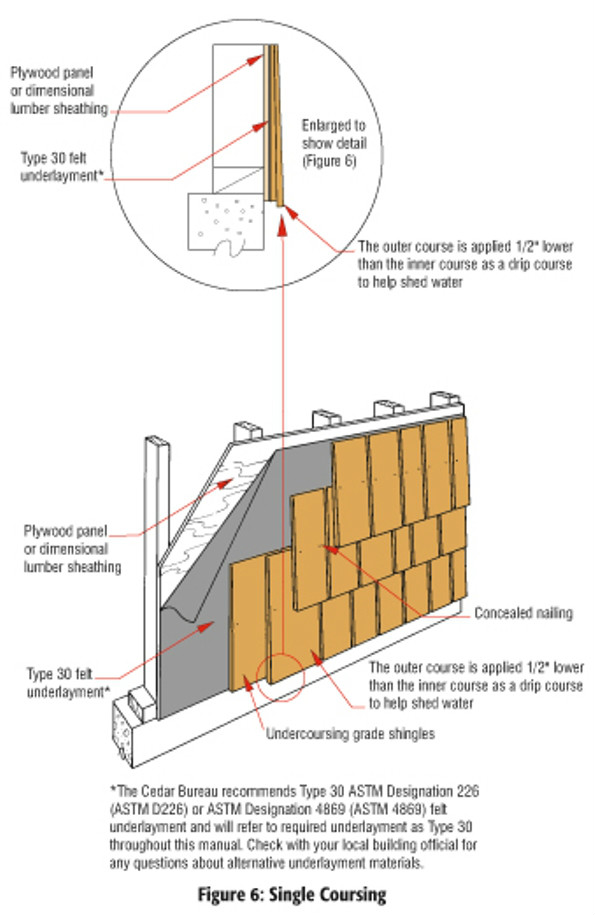
That being said this was a good learning experience (although I am not quite finished...). I split all the shingles to width (when needed) with a carpenters hatchet that I refurbished last year, and more complicated cuts included the use of a handsaw and a chisel. Most of the shingles had decently straight grain so they split fairly easily. I didn't need to plug in my miter saw at all, which let me work much more quietly and efficiently (although I did use a pneumatic roofing nailer to install the shingles). Being able to cut/split everything without having to walk all over the place was nice. As with all construction techniques, there are a million and one ways to install cedar shingles. The thing I like about shingled siding is that depending on the installation technique the shingles can look perfectly trimmed and modern or they can be more rustic and imperfect. I intentionally installed these in a slightly random fashion to keep some visual interest. I followed along each row with a short level to make sure I wasn't getting too far out, but everything else, with exception of the first course, was just installed via a well calibrated eyeball (I winged it). I did the first course and undercourse like the diagram below:
 |
| The North Side |
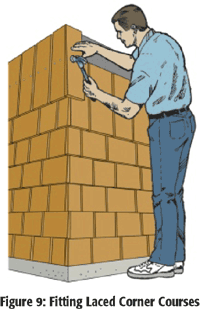
I opted for site-made cedar "j-channel" (not installed yet) which will just be two staggered pieces of cedar trim on the corners of the shed to keep weather off of the very edges of the corners. Another technique that I think would have worked well is to lace the corners, which looks nice.
Other techniques:
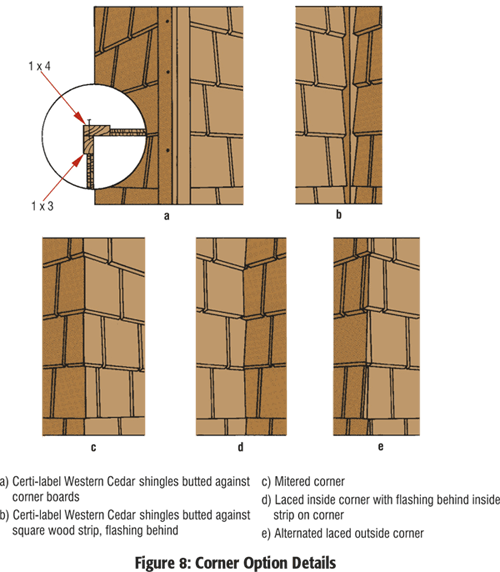 |
| Illustration from http://www.cedarbureau.org |
Maybe for the next shed I'll split my own shakes like this guy...